
Dr.Yashasvi
Dental Content Contributor
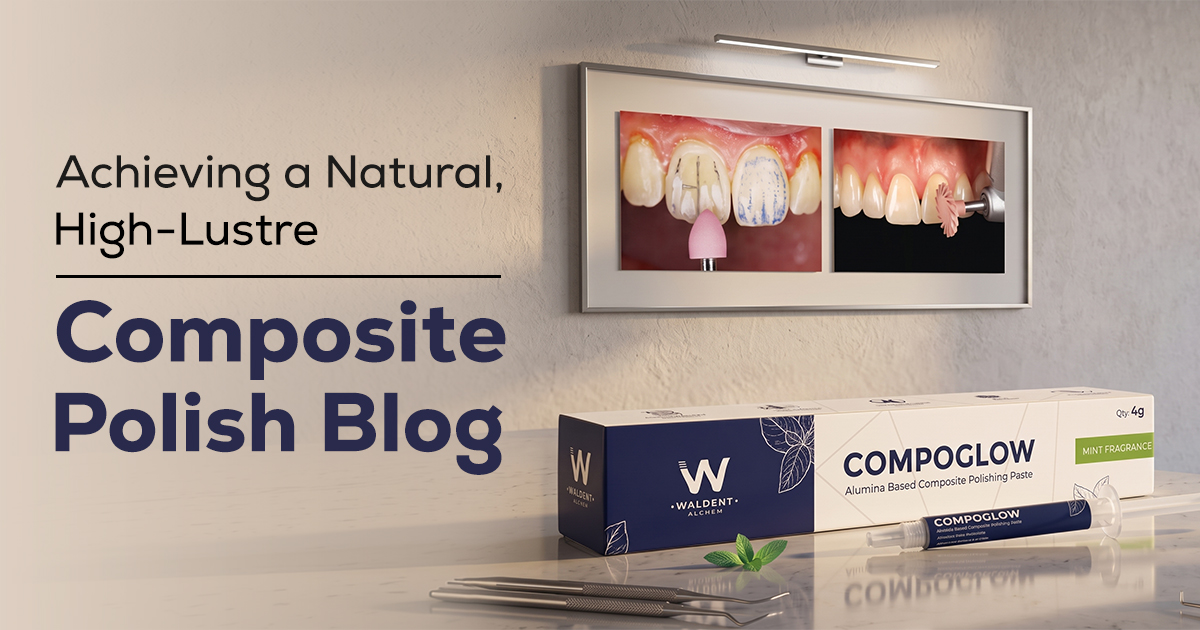
Achieving a Natural, High-Lustre Composite Polish
A Case-Based Finishing Protocol
Composite finishing and polishing is a multi-step procedure using specific burs and abrasives to contour, smooth, and impart high lustre to restorations. This crucial final step enhances aesthetics, minimizes plaque, and improves long-term stain resistance.
Table of Contents
Polishing a Class IV Anterior Restoration
To polish a Class IV restoration, use a sequential approach: fine-grit diamond or multi-fluted carbide burs for gross contouring, flexible discs of decreasing grit, then abrasive-impregnated points and pastes for final lustre. This systematic surface roughness reduction is essential for an imperceptible margin and natural finish.
Recreating facial anatomy (developmental grooves, line angles) is critical for natural light reflection. Use a slow-speed handpiece under 10,000 RPM with water spray to prevent resin overheating, discoloration, and pulpal irritation. Meticulous interproximal finishing with abrasive strips ensures smooth, cleansable embrasure space, preventing marginal staining. A comprehensive finishing and polishing kit provides necessary instruments.
- Initial Contouring: Use a flame-shaped, 12-fluted carbide bur to define facial outline and line angles without ditching tooth structure.
- Surface Texturing: Recreate perikymata and subtle textures with a fine diamond bur or white stone point at very low speed.
- Interproximal Finishing: Employ aluminum oxide strips (medium to extra-fine) to smooth contact and gingival margin.
- Final Gloss: Achieve high shine using a felt wheel or silicone cup with diamond polishing paste.
Step 1: Gross Contouring
Use a 12 or 16-fluted carbide bur (8,000-10,000 RPM) to establish primary anatomy, facial contours, and incisal edge.
Step 2: Fine Finishing & Anatomy
Use flexible abrasive discs (medium to fine) to refine line angles and smooth surfaces. Use a fine diamond bur for secondary anatomy.
Step 3: Pre-Polishing
Use silicone-impregnated points or cups to remove disc scratches, creating a smooth, satin finish for final polishing.
Step 4: Final Lustre
Apply diamond polishing paste with a felt disc or foam cup at low speed (< 5,000 RPM) with light, intermittent pressure for a high-gloss, enamel-like surface.
Finishing Sequence for Composite Veneers
Finishing direct composite veneers involves meticulous contouring for primary anatomy and emergence profiles, followed by systematic surface texturing and multi-stage polishing for a glaze-like, enamel-mimicking surface. The goal is symmetry, correct proportions, and managing the large facial area without flat planes.
Before starting, mark desired transition line angles on the cured veneer with a graphite pencil. This guide helps maintain symmetry and ensures accurate contouring. High-quality dental composites, especially nanofill or nanohybrid, significantly influence polishing ease and aesthetic outcome. A systematic approach prevents over-contouring and preserves restoration vitality.
- Define Line Angles: Use a flat-ended, tapered diamond bur to establish mesial and distal transition lines, crucial for defining tooth width and light reflection.
- Create Surface Texture: Use a pointed white stone or fine diamond to lightly create vertical developmental grooves and horizontal perikymata for natural texture.
- Gingival Margin Finishing: A needle-shaped, 12-fluted carbide bur is ideal for creating a seamless, well-adapted gingival margin without soft tissue damage.
- Systematic Disc Sequence: Progress through a full sequence of abrasive discs (coarse to extra-fine) to methodically smooth the entire facial surface.
Phase 1: Primary Anatomy & Contouring
Establish overall shape, length, and incisal edge with carbide finishing burs and coarse-to-medium flexible discs.
Phase 2: Secondary & Tertiary Anatomy
Use fine diamond points or white stones to etch developmental lobes, grooves, and perikymata, breaking up flat surfaces.
Phase 3: Sequential Pre-Polishing
Smooth the surface using fine/extra-fine discs, followed by abrasive-impregnated silicone polishers to remove scratches.
Phase 4: High-Gloss Finalization
Apply a 1-micron diamond paste with a felt wheel or polishing brush for a final, enamel-like lustre.
Polishing Posterior Composites and Anatomy
To polish posterior composites while preserving anatomy, use flame-shaped finishing burs for occlusal grooves/fossae, followed by pre-polishing points and brushes that adapt to cuspal inclines without flattening them. The primary challenge is achieving a plaque/stain-resistant high-gloss surface without erasing functional occlusal morphology.
Work with light, intermittent brushing motion at 5,000-7,000 RPM to avoid heat and composite degradation. For interproximal areas, use finishing strips to smooth marginal ridge and contact point without opening the contact. The final step often involves occlusal polishing brushes (goat hair or nylon) with polishing pastes to reach deep grooves and impart uniform lustre across the occlusal table.
- Occlusal Anatomy: Use a pointed or flame-shaped fine finishing bur to smooth primary grooves and fossae. Never run a flat disc across the occlusal surface.
- Interproximal Smoothing: Polish proximal box and marginal ridge areas with flexible polishing discs or rubberized abrasive points.
- Cusp Inclines: Use cup-shaped or point-shaped silicone polishers to adapt to individual cusp inclines.
- Final Luster: A spiral wheel or occlusal brush with diamond paste excels at achieving a final polish in all anatomical depressions.
Preserving Occlusal Anatomy
Use a pointed white stone or flame-shaped fine diamond bur at very low speed (under 5,000 RPM) with minimal pressure to smooth fossae. Follow existing anatomy; never move the bur across cusp tips, as this flattens the restoration and erases functional morphology.
Which Polishers for Different Composites?
Polishing point and bur choice depends on composite filler particle size: microfills/nanofills require finer abrasives for high gloss, while microhybrids may need a more aggressive initial step for their larger particles. Wrong abrasives can fail to shine or excessively abrade the resin matrix, exposing filler.
Nanofilled composites (20-75 nm particles) polish easily, exhibiting superior gloss retention, ideal for anterior aesthetics. Microhybrid composites, though durable, have larger particles (0.4-1.0 µm) requiring a robust finishing sequence, often starting with diamond burs. The key is matching polisher abrasive size to composite filler size using a sequential grit system from modern finishing and polishing kits.
- Carbide vs. Diamond Burs: Tungsten carbide burs (12-30 flutes) produce a smoother initial finish than diamonds, excellent for contouring. Fine-grit diamonds are faster for gross reduction but may leave a rougher surface needing more polishing steps.
- Silicone Polishers: Silicone polishers are impregnated with abrasive particles (e.g., silicon carbide, aluminum oxide, diamond) in various shapes/grits for pre-polishing and final polishing.
- Discs and Strips: Aluminum oxide-coated flexible discs are indispensable for facial and incisal surfaces, offering excellent contour control.
- Pastes and Brushes: Diamond pastes (1-3 µm) with felt or brush applicators provide the highest possible final lustre.
| Composite Type | Recommended Finisher | Recommended Polisher |
|---|---|---|
| Nanofill / Microfill | Multi-fluted carbide burs (16-30 flutes) | Fine silicone points, diamond paste best |
| Nanohybrid | Fine-grit diamond burs or carbide burs | Medium-to-fine silicone points, diamond paste |
| Microhybrid | Fine diamond burs for initial smoothing value | Multi-step silicone polishers (medium, fine, extra-fine) |
Frequently Asked Questions
Composite finishing is gross contouring to establish correct anatomy, shape, and smooth margins, typically using carbide or diamond burs. Polishing refines the surface to be exceptionally smooth and lustrous, achieved with finer abrasives like flexible discs, rubberized points, and pastes. Finishing creates shape; polishing creates shine.
A chalky or white appearance after polishing is often due to overheating the composite surface, dehydrating and damaging the resin matrix. This results from excessive pressure, high speed (above 10,000 RPM), or insufficient water/air coolant. Prevent this with light, intermittent strokes, slow-speed handpiece, and adequate cooling.
For the highest lustre on anterior composites, a 1-micron diamond polishing paste is the gold standard, exceptionally effective on nanofill and microfill composites. Apply with a felt wheel or soft brush at very low speed (under 5,000 RPM) to create an enamel-like gloss without heat generation.
A composite restoration should be evaluated and potentially re-polished at every routine dental check-up (6-12 months). Over time, diet and oral hygiene can cause surface stains and lustre loss. A quick re-polishing with a fine-grit rubber cup or paste restores aesthetics, longevity, and stain resistance.
The ideal speed for polishing composites is 5,000-10,000 RPM, using light, intermittent touch. For final high-shine with pastes, reduce speed below 5,000 RPM. Higher speeds generate excessive frictional heat, damaging the composite's resin matrix and potentially harming the pulp.
Written by
Dr.Yashasvi
Dental Content Contributor
Dr. Yashasvi Sharma is a contributing Dental professional at Dentalkart Blogs, where she distills chair-side clinical experience into evidence-based, practice-ready guides for Indian dentists. Her work bridges the gap between academic dentistry and everyday practice, translating global research into actionable insights tailored to the realities of Indian clinical settings.
Keep reading
Browse all →
Mastering Dental Composite Case Selection in 2026
Mastering Dental Composite Case Selection in 2026Optimal Use for Aesthetic Restorations Effective composite case selection involves matching a material's specif

Ideal Clinical Cases for Dental Photo Contrastors
Ideal Clinical Cases for Dental Photo ContrastorsElevating Your Clinical Photography Dental photography contrastors are non-reflective, black intraoral tools th

Cotton Rolls vs Parotid Shields for Isolation?
Cotton Rolls vs Parotid Shields for Isolation?A Moisture Control Decision Guide Effective dental isolation techniques depend on case selection: cotton rolls are