
Step-by-Step Protocols for Minimally Invasive Cosmetic Dentistry (No-Prep Veneers & More)
Dr. Noopur Aggarwal
Contributing Dental Clinician
Cosmetic dentistry is no longer about aggressive tooth reduction it is about preserving enamel, enhancing aesthetics, and maintaining long-term tooth health.
Today’s best outcomes come from additive dentistry, not subtractive dentistry. Instead of cutting teeth down, we build them up using techniques such as digital smile design, no-prep veneers, composite bonding and minimal-prep veneers.
If you’ve ever wondered:
“Can I improve a smile without drilling?”
“How do I plan no-prep veneers safely?”
“When should I choose bonding over veneers?”This guide gives you a clear, step-by-step clinical roadmap.
What Is Minimally Invasive Cosmetic Dentistry?
Minimally invasive cosmetic dentistry focuses on:
- Preserving natural tooth structure.
- Avoiding unnecessary enamel removal.
- Using adhesive materials instead of mechanical retention
- Prioritizing function along with aesthetics
Common procedures include:
- Minimal-prep veneers
- Direct composite bonding
- Enamel re-contouring
- Teeth whitening
- Additive smile design
- Digital planning before treatment
Step 1 – Patient Assessment & Smile Analysis
Before touching a tooth, you must diagnose properly.
Clinical Evaluation
Check for:
- Tooth wear
- Fractures or cracks
- Existing restorations
- Occlusion (bite)
- Gingival health
- Smile line and lip support
- Midline alignment
Aesthetic Evaluation
Ask yourself:
- Are teeth too short?
- Are they discolored?
- Is spacing present?
- Are proportions incorrect?
- Is there a gummy smile?
Step 2 – Digital Smile Design (DSD) or Mock-Up
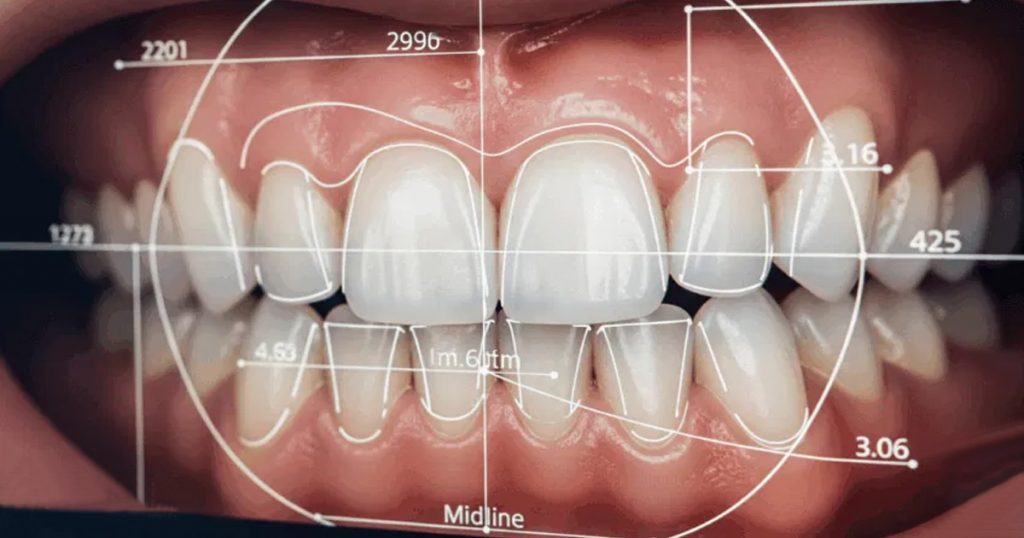
This is the most important step in minimally invasive dentistry.
You can:
- Take digital photos
- Use smile design software
- Create a digital wax-up
- Or do a chair side mock-up with composite
This helps:
- You visualize the result
- The patient understands expectations
- Avoid over-reduction or unnecessary work
Step 3 – Decide the Right Treatment Modality
Your choice depends on the clinical scenario.
Choose Composite Bonding if:
- Minor discoloration.
- Small chips.
- Mild spacing.
- Minimal shape correction needed.
Advantages:
- No tooth reduction.
- Reversible.
- Affordable.
- Repairable.
Choose No-Prep Veneers if:
- Teeth are slightly discolored.
- Spacing exists.
- Mild shape issues.
- Patient wants a dramatic aesthetic upgrade.
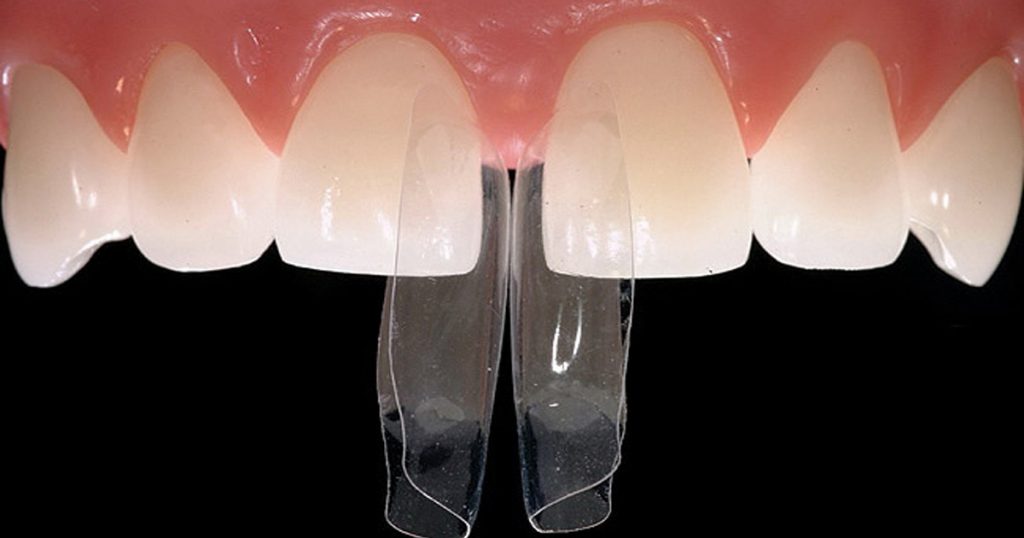
No-prep veneers are placed directly over enamel without cutting teeth.
Choose Minimal-Prep Veneers if:
- Teeth are rotated
- Mild crowding exists.
- Teeth are bulky
- Need better symmetry
Here, only 0.2–0.5 mm enamel may be reduced.
Step 4 – Step-by-Step Protocol for No-Prep Veneers
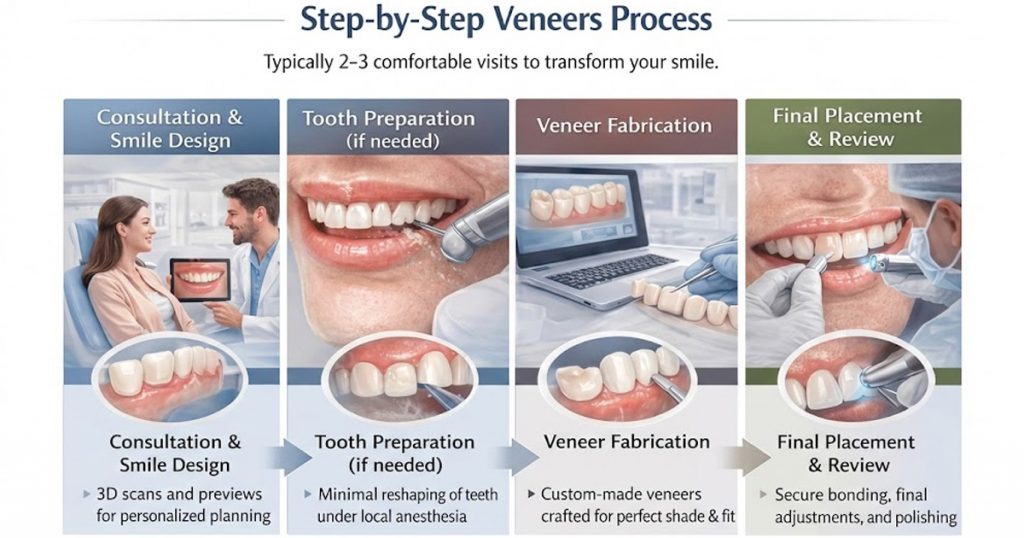
A. Tooth Preparation (None or Minimal)
In true no-prep cases:
- No drilling
- No anesthesia
- No enamel removal
You only clean the tooth surface.
B. Try-In Phase
Use trial veneers to:
- Check fit
- Check color
- Check alignment
- Get patient approval
This step prevents dissatisfaction later.
C. Bonding Protocol
- Etch enamel
- Rinse and dry
- Apply bonding agent to the surface of teeth.
- Place resin cement
- Seat veneer
- Remove excess cement
- Light cure
D. Final Polish and Occlusion Check
After bonding:
- Polish margins
- Adjust occlusion
- Ensure smooth contacts
Step 5 – Step-by-Step Protocol for Direct Composite Bonding
This is one of the most conservative cosmetic procedures.
Indications:
- Chipped teeth
- Mild discoloration
- Diastema closure
- Short teeth
Steps:
- Clean tooth surface.
- Light enamel etching.
- Apply bonding agent to the surface of teeth.
- Layer composite resin.
- Shape and contour.
- Light cure.
- Final polish.
Step 6 – Enamel Re-contouring (Tooth Reshaping)
This is ideal for:
- Slightly uneven edges.
- Mildly pointed canines.
- Irregular incisal margins.
You remove only a tiny amount of enamel and polish it well using burs and discs.
Step 7 – Whitening Before Veneers or Bonding
Always whiten teeth before cosmetic work.
Why?
Because veneers and composites do not change color with bleaching.
Recommended options:
- In-office whitening
- At-home bleaching trays
- Combination approach
Step 8 – Occlusion Management (Critical Step!)
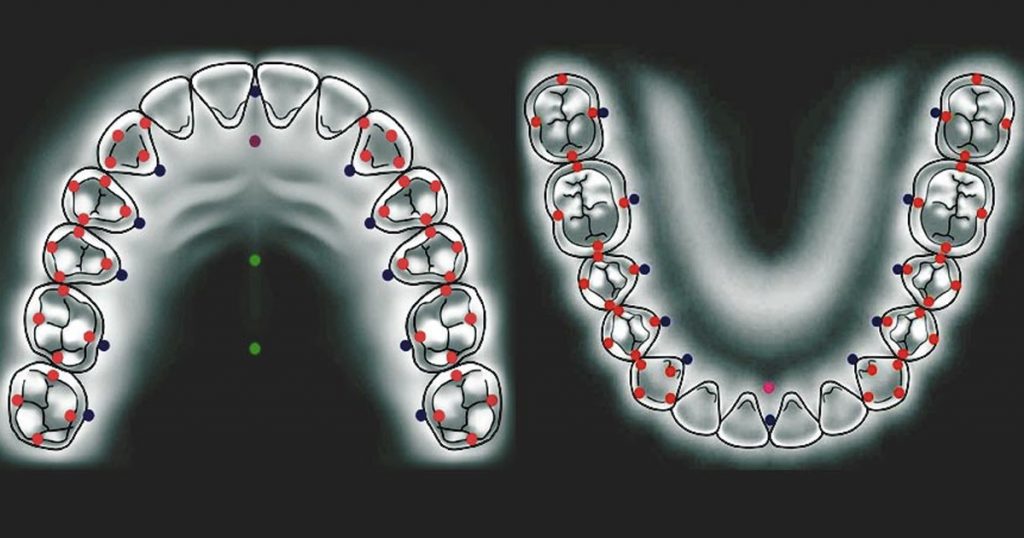
Many cosmetic failures happen because dentists ignore bite.
Before finalizing:
- Check for heavy contacts
- Look for bruxism
- Adjust occlusion if needed
- Consider night guard if grinding exists
Step 9 – Maintenance & Follow-Up
Tell patients to:
- Avoid staining foods for 48 hours
- Use soft toothbrush
- Avoid biting hard objects
- Schedule regular cleanings
Comparison: No-Prep Veneers vs Composite Bonding
| Feature | No-Prep Veneers | Composite Bonding |
|---|---|---|
| Tooth reduction | None | None |
| Durability | Very high | Moderate |
| Stain resistance | Excellent | Lower |
| Repairability | Difficult | Easy |
| Cost | Higher | Lower |
| Longevity | 10–15 years | 5–8 years |
When NOT to Do No-Prep Veneers
Avoid no-prep veneers if:
- Severe crowding
- Heavy staining (tetracycline)
- Deep caries
- Severe bite problems
- Active periodontal disease
Clinical Tips for Success
- Always plan digitally
- Never rush bonding steps
- Prioritize enamel preservation
- Respect occlusion
- Communicate clearly with lab
Final Thoughts
Minimally invasive cosmetic dentistry is the future. It allows you to transform smiles while respecting biology, function, and longevity.
The best cosmetic dentists today are not those who drill more but those who preserve more.
FAQs
Yes, but they can be replaced if needed.
No, if done properly on intact enamel.
Yes, but veneers last longer and resist stains better.
Usually no, because there is minimal or no drilling.
Typically 10–15 years with proper care.
Written by
Dr. Noopur Aggarwal
Contributing Dental Clinician
Dr. Noopur Aggarwal writes for Dentalkart Blogs on clinical decision-making, patient communication, and the materials and tools that shape modern dental practice.
Keep reading
Browse all →
Achieving a Natural, High-Lustre Composite Polish
Achieving a Natural, High-Lustre Composite PolishA Case-Based Finishing Protocol Composite finishing and polishing is a multi-step procedure using specific burs

Mastering Anterior Isolation with a Rubber Dam — Techniques for Perfect Composites
Mastering Anterior Isolation with a Rubber DamTechniques for Perfect Composites A dental rubber dam is critical for achieving predictable, durable anterior comp

Troubleshooting Common Dental Bleaching Issues — A Practical Troubleshooting Guide
Troubleshooting Common Dental Bleaching IssuesA Practical Troubleshooting Guide Teeth whitening is a popular aesthetic service that boosts patient confidence. H
