Dentalkart Editorial
Editorial Team
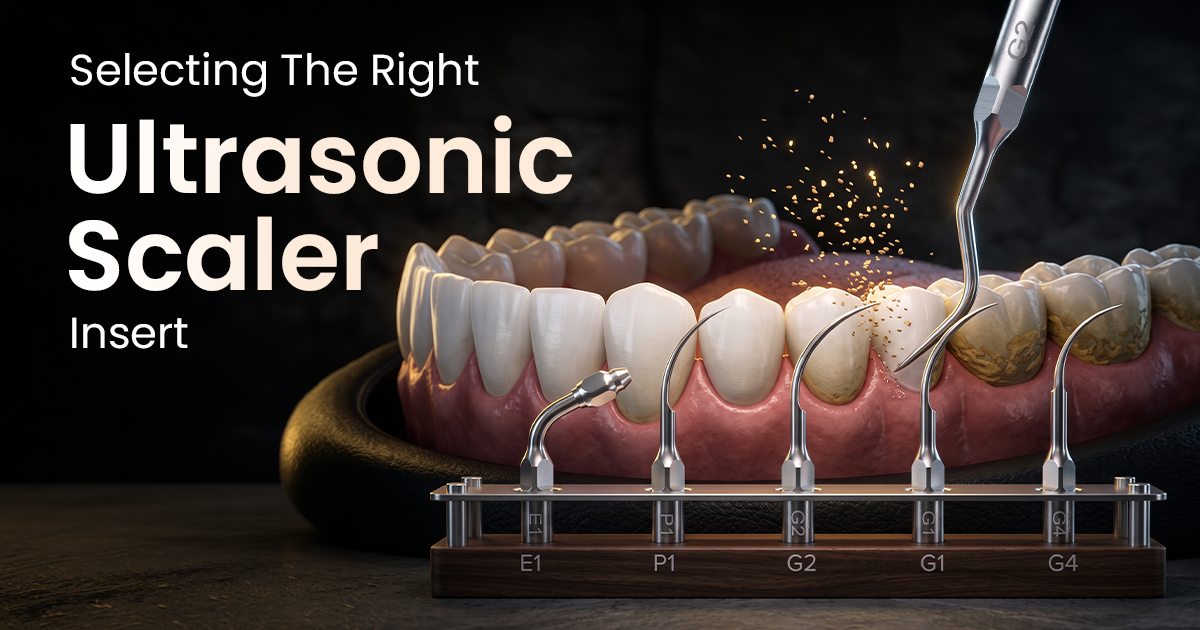
Selecting The Right Ultrasonic Scaler Insert
A Clinical Application Guide
Selecting the right ultrasonic scaler inserts involves matching tip geometry and material to the specific clinical task, from bulk supragingival calculus to fine subgingival debridement. This choice directly impacts procedural efficiency, patient comfort, and root surface integrity.
Table of Contents
Piezo vs. Magnetostrictive Scaler Tips
The primary difference between Piezo and Magnetostrictive tips is their mechanism of action and resulting tip movement. Piezoelectric scalers use ceramic crystals for linear, back-and-forth motion, while magnetostrictive units use ferromagnetic strips to generate an elliptical motion.
Clinically, Piezo tips' linear motion is less traumatic to the root surface, making them ideal for fine debridement as only lateral sides are active. Magnetostrictive tips (18-45 kHz) are active on all surfaces, advantageous for rapid removal of heavy, tenacious calculus. Piezo units tend to generate less heat, but both require adequate water lavage to prevent thermal damage to the pulp and surrounding tissues.
- Motion Pattern: Piezo tips move linearly, activating only lateral surfaces. Magnetostrictive tips have an elliptical pattern, activating all surfaces.
- Energy Source: Piezoelectricity is generated by crystal dimension changes under an electric field. Magnetostriction uses a magnetic field to change a ferromagnetic core's dimension.
- Heat Generation: Magnetostrictive handpieces and inserts typically generate more heat, requiring diligent water flow management.
- Tip Design: Piezo tips screw directly into the handpiece, offering better visibility. Magnetostrictive inserts have a larger stack that fits inside the handpiece.
Piezoelectric Tips
- Linear motion is less damaging to root surfaces.
- Generates less heat in the handpiece.
- Better visibility due to direct-fit tips.
- Only lateral surfaces are active.
Magnetostrictive Tips
- All tip surfaces are active, allowing for efficient bulk removal.
- Robust design is less prone to fracture.
- Elliptical motion can be more aggressive on cementum.
- Generates more heat, requiring higher water flow.
How to Choose Tips for Subgingival Scaling
To choose the right tip for subgingival scaling, select a slim, probe-like 'perio' insert designed for low-power operation. These tips allow safe access into periodontal pockets >4 mm deep without causing iatrogenic damage to the root surface or epithelial attachment.
The thin profile of a perio tip enhances tactile sensitivity, allowing the clinician to feel the difference between calculus and root surface. Unlike standard 'universal' tips for supragingival scaling, these slim inserts are not designed for fracturing heavy calculus. Instead, they disrupt biofilm and remove fine deposits with a light, sweeping motion. Using a perio tip with high power can burnish calculus, making it smooth and difficult to detect, or even fracture the delicate instrument tip.
- Pocket Depth: Use slim perio inserts for pockets deeper than 4-5 mm where standard tips cannot safely reach.
- Calculus Type: Perio tips are for light to moderate subgingival deposits and biofilm disruption, not heavy supragingival ledges.
- Power Setting: Always use perio tips on a low power setting (10-30%) to maximize patient comfort and prevent root surface damage.
- Technique: Employ a light, exploratory, 'erasing' motion, similar to using a periodontal probe.
Subgingival Tip Selection Matrix
What Are The Best Scaler Tip Power Settings?
The best power setting is always the lowest effective level for the clinical task. Use high power (70-100%) for bulk calculus removal with standard tips and low power (10-30%) for deplaquing and subgingival work with slim perio ultrasonic scaler inserts.
Using excessive power does not improve efficiency and can be counterproductive. Overpowering a thin perio tip will dampen its vibration, burnish calculus onto the root surface, and risk tip fracture. For heavy calculus, a moderate-to-high setting on a robust universal tip allows efficient micro-fracturing. Crucially, water flow must increase proportionally with the power setting to dissipate heat. A fine mist or 'halo' of atomized water from the tip indicates adequate cooling, preventing thermal injury to the pulp, which can occur at temperatures above 42.5°C.
- Heavy Calculus: Use a standard or universal tip at 70-100% power with copious water flow.
- Light Deposits & Stains: A universal tip at 30-60% power is sufficient for most routine cases.
- Subgingival Debridement: Use a slim perio tip at 10-30% power to avoid damaging cementum.
- Implant Maintenance: Use a plastic or carbon-fiber tip at the lowest possible power setting (<10%) to protect the titanium surface.
The Power-Water Balance
Always start at a low power setting and gradually increase until you feel calculus fracture. Match water flow to power: low power requires a fast drip, while high power demands a robust spray for a fine cooling mist. The goal is efficient removal, not aggressive ablation.
When Should I Replace a Worn Ultrasonic Tip?
An ultrasonic scaler tip must be replaced when it shows 2 mm of wear, as this corresponds to an approximate 50% loss in scaling efficiency. Continuing to use a worn tip is clinically ineffective and detrimental to both patient and clinician.
A worn tip has a blunted, rounded profile that cannot effectively fracture calculus. To compensate for efficiency loss, clinicians often increase power and pressure. This generates excessive heat, reduces patient comfort, and leads to clinician fatigue. Instead of fracturing, the worn tip may burnish calculus, making it smooth and difficult to detect or remove. A tip wear guide, provided by most manufacturers, reliably determines when a tip reaches the 2 mm wear threshold and needs discard.
- 1 mm Wear: Results in approximately 25% loss of scaling efficiency. The tip is functional but requires more time and effort.
- 2 mm Wear: Corresponds to 50% loss of efficiency. The tip should be replaced immediately.
- Visual Inspection: Look for blunted or rounded ends, indicating significant wear even without a guide.
- Performance Check: If increasing power or pressure for routine scaling, check your tip for wear.
TIP WEAR AND EFFICIENCY LOSS
Provides 100% scaling efficiency with optimal calculus fracture and minimal pressure.
Loses about 25% efficiency, requiring more time and higher power settings.
Loses 50% efficiency; the tip will burnish calculus and must be replaced immediately.
Frequently Asked Questions
A universal ultrasonic scaler insert is a versatile tip designed for moderate to heavy supragingival calculus removal in most areas of the mouth. Its robust, slightly curved shape allows efficient scaling of accessible surfaces, but is generally too bulky for deep subgingival pockets or complex root anatomy. It serves as the primary workhorse tip for routine prophylaxis cases before switching to more specialized inserts.
Ultrasonic scalers are generally more efficient for removing heavy calculus and disrupting biofilm during deep cleaning, often resulting in less chair time and operator fatigue. Their lavage effect also flushes debris from pockets. However, hand scalers provide superior tactile sensitivity for detecting residual calculus and are essential for final root planing to achieve a perfectly smooth surface. A combination of both is the gold standard for non-surgical periodontal therapy.
Ultrasonic scaler inserts must be sterilized after every single patient use, without exception. They are considered critical instruments as they come into contact with blood and saliva. Inserts should be cleaned of debris and then steam autoclaved according to manufacturer's instructions, typically at 134°C for 3-4 minutes in a Class B autoclave. Failure poses a significant cross-contamination risk.
For removing stubborn extrinsic stains (e.g., tobacco or chlorhexidine), a wide, flat-bladed or beavertail-style ultrasonic tip is most effective when used on a medium power setting. These tips have a larger active surface area for broad, sweeping strokes. For interproximal stains, a standard universal or specialized stain removal tip can be used. It is often combined with an air-polishing system for optimal results.
A lack of vibration in an ultrasonic scaler tip is often due to the power setting being too low or the tip being improperly seated. For piezo units, ensure the tip is fully tightened with the provided wrench. For magnetostrictive units, check that the O-rings on the insert are intact and lubricated, and that the insert is fully seated in the handpiece. A faulty handpiece cable or scaler's internal generator malfunction could also be the cause.
Written by
Dentalkart Editorial
Editorial Team
The Dentalkart Editorial team curates dental education content, treatment guides, and equipment insights drawn from clinical research and feedback from practising dentists across India.
Keep reading
Browse all →
Ergonomic Dental Chairs: Enhancing Dentist Comfort &
Ergonomic Dental Chairs: Enhancing Dentist Comfort & EfficiencyOptimize practice comfort and productivity. An ergonomic dental chair is a treatment unit spe

Mastering Pediatric Crown Placement — A Step-by-Step Protocol
Mastering Pediatric Crown PlacementA Step-by-Step Protocol Pre-formed metal crowns are a cornerstone of pediatric restorative dentistry, offering durability for

Essential Airotor & Handpiece Care — A Practical Longevity Guide
Essential Airotor & Handpiece CareA Practical Longevity Guide Your airotor is a critical clinical workhorse, yet its complex upkeep is often overlooked in a
