
Dr. Bhavishya Arora
Chief Dental Editor
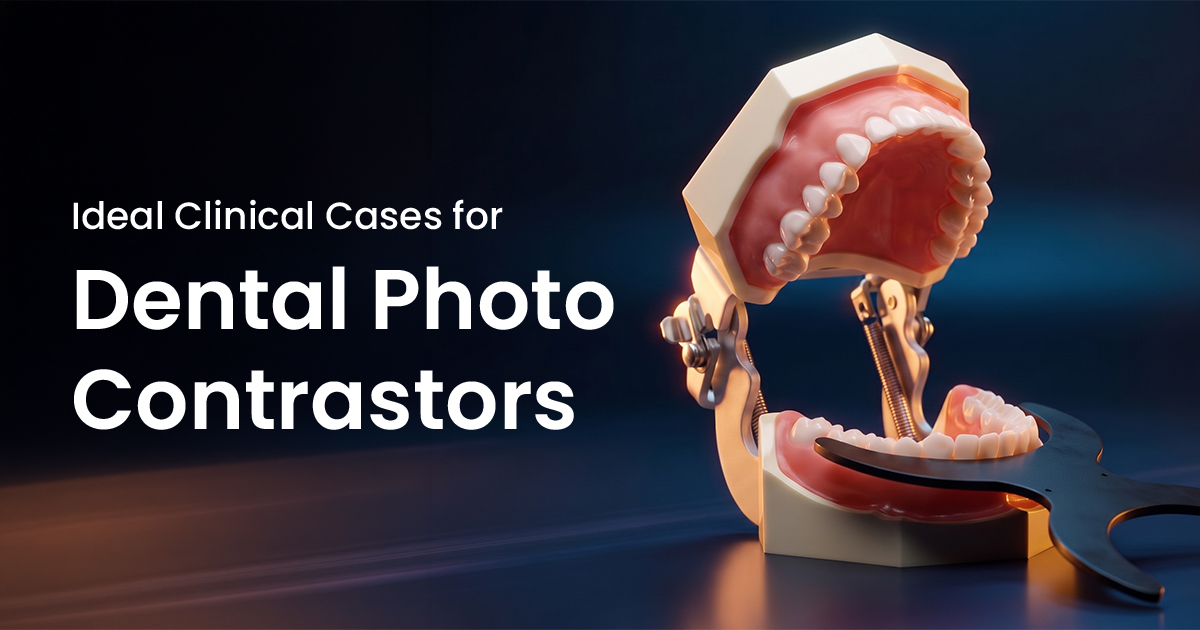
Ideal Clinical Cases for Dental Photo Contrastors
Elevating Your Clinical Photography
Dental photography contrastors are non-reflective, black intraoral tools that isolate teeth from distracting background tissues like the tongue and palate. This accessory dramatically improves image diagnostic and aesthetic quality, crucial for superior lab communication and patient case presentation.
Table of Contents
Defining Dental Contrastors and Their Purpose
A dental contraster is an autoclavable, non-reflective black instrument, typically anodized aluminum or PEEK plastic, providing a clean, dark background for intraoral photographs. By eliminating distractions like the palate, tongue, or lips, it directs the camera's light meter and viewer's eye solely to the teeth. Beyond aesthetics, it prevents inaccurate light reflection and color casting.
This isolation improves tooth value (lightness/darkness) and chroma perception, often distorted by surrounding soft tissues. For lab technicians, contraster photos offer clearer, more accurate representation of incisal translucency, enamel texture, and subtle shade variations, reducing aesthetic restoration remakes. They are fundamental for high-end aesthetic practices.
- Eliminates Distractions: Creates a solid black background, hiding the tongue, uvula, and palate for a clean, professional image.
- Improves Color Accuracy: Prevents camera sensor influence from soft tissue colors, leading to accurate shade representation.
- Enhances Detail Perception: Makes subtle details like incisal edge effects, mamelons, craze lines, and surface texture more visible.
- Professional Presentation: Elevates case documentation for patient education, publications, and lectures, demonstrating high-standard care.
THE THREE CORE BENEFITS OF A CONTRASTER
Frames teeth, removing distracting anatomical structures from the background.
Subtle translucency, value, and characterization details become more apparent.
Clean, studio-quality images improve lab communication and patient case acceptance.
Which Anterior Cases Mandate a Contraster?
Contrastors are indispensable for anterior cases where the aesthetic outcome depends on accurately capturing incisal edge character, translucency, and subtle color gradients. They provide the dark background needed to visualize the 'halo' effect and opalescence, otherwise lost against the oral cavity backdrop. For these cases, a contraster is a required diagnostic and communication tool.
When documenting restorations, the contraster highlights marginal seal quality and the blending of composite or ceramic with natural tooth structure. Without a contraster, lab technicians may misinterpret restoration value, often resulting in opaque or low-value crowns or veneers. Standardizing anterior photography with a contraster ensures consistency and predictability.
- Veneer & Crown Work-ups: Essential for capturing incisal translucency and shade mapping for the lab.
- Class IV Composites: Accurately documents and replicates incisal halo and blends multi-layered composite shades.
- Diastema Closure: Helps visualize final tooth contours and symmetry without background distractions.
- Bleaching Documentation: Provides a stable, neutral background to accurately assess pre- and post-treatment shade changes.
- Shade Matching: Isolates the tooth during shade selection, preventing color contamination from lips and gingiva.
Contraster Use: Anterior Case Selection
Utility of Contrastors in Posterior Photography
While primarily for anterior aesthetics, specially designed occlusal contrastors offer advantages for full-arch and posterior documentation. These larger, forked instruments frame the dental arch, effectively masking cheeks, tongue, and mouth floor. This creates a clean, unobstructed view of occlusal surfaces, highly beneficial for specific diagnostic and treatment planning.
For full-mouth rehabilitations or orthodontic records, an occlusal contraster provides a 'studio portrait' of the entire arch. This allows clear evaluation of the occlusal plane, wear patterns, and tooth alignment without visual noise. It is particularly effective for 'before and after' shots in complex cases, providing a clear, dramatic depiction of treatment outcomes for patients and colleagues.
- Full-Arch Prosthodontics: Ideal for documenting pre-operative states and showcasing final results of full-mouth rehabilitations.
- Orthodontic Documentation: Provides clean, standardized records of arch form, crowding, and treatment progress.
- Bruxism & Wear Analysis: Highlights wear facets and abfractions on occlusal surfaces by removing distracting shadows.
- Implant Planning: Useful for creating clear images of edentulous ridges and surrounding dentition for surgical guides and planning.
- Sealant Monitoring: Offers a clear view to assess integrity and marginal staining of pit and fissure sealants during recall.
Positioning for Occlusal Shots
To avoid instrument shadows, position twin flashes at a 45-degree angle to the occlusal plane. Have the patient gently bite on contraster handles for stability, ensuring no part obscures terminal molars. Use a high-quality intraoral mirror with the contraster for best results.
Identify When to Skip the Contraster
A contraster is unnecessary, even counterproductive, when the clinical context requires visualizing surrounding soft tissues. For oral pathology, periodontics, or forensics, capturing teeth in their natural environment provides essential information a contraster would obscure. The photograph's goal dictates the tool; if the background is part of the story, leave it in the frame.
For example, documenting a suspected oral lesion requires including its relationship to adjacent anatomical structures. A contraster would hide this critical information. Similarly, for basic charting, insurance claims, or legal documentation, an unaltered photograph provides a complete, objective record of the patient's oral condition. In these situations, clarity is achieved through proper lighting and focus, not background elimination.
- Oral Pathology Screening: Lesion location, size, and appearance relative to surrounding tissues is diagnostically critical.
- Periodontal Charting: Documenting gingival inflammation, recession, or mucogingival defects requires clear soft tissue view.
- Forensic Odontology: Legal records demand unaltered images showing full context of dentition and surrounding structures.
- General Screening Photos: For a quick new patient intraoral tour, speed outweighs aesthetic perfection.
- TMJ/Occlusal Analysis: Some views require seeing tongue posture or buccal corridors, which a contraster would block.
Conclusion: Purpose-Driven Photography
The decision to use dental photography contrastors must be driven by the image's specific goal. For anterior aesthetics and precise lab communication, they are essential for predictable, high-quality outcomes. However, for diagnostic images where soft tissue context is paramount, or for routine documentation, their use is unnecessary. Mastering when to use or omit a contraster advances clinical photography from simple documentation to a powerful diagnostic and communicative instrument.
- Anterior Aesthetics: Always use a contraster for veneers, Class IV restorations, and lab shade communication to accurately capture value and translucency.
- Full-Arch Views: Employ large occlusal contrastors for orthodontic records and full-mouth rehabilitation, providing a clean, comprehensive overview.
- Pathology & Periodontics: Do NOT use a contraster when documenting lesions or gingival conditions; surrounding tissue context is diagnostically essential.
- Material Choice: For frequent use, PEEK plastic contrastors are lighter and more comfortable than metal, and fully autoclavable up to 134°C.
Frequently Asked Questions
The primary function of dental photography contrastors is to create a non-reflective, black background that isolates teeth from surrounding oral structures like the tongue and palate. This enhances visibility of subtle tooth characteristics such as translucency, color value, and texture, leading to accurate diagnostics, better lab communication, and professional case presentations.
Most high-quality dental contrastors (anodized aluminum or PEEK plastic) are steam autoclavable. Clean of debris, bag, and sterilize in a standard autoclave cycle at 134°C. Always follow manufacturer's instructions, as some coatings are sensitive to certain chemical disinfectants or ultrasonic cleaning.
For anterior teeth, a 'C' or 'U' shaped contraster with a contoured cutout mimics the dental arch curvature. This design effectively frames maxillary or mandibular incisors while handles are held by the patient or assistant outside the lips, providing a clean black background for frontal and lateral aesthetic shots.
Yes, a contraster affects camera settings. The large black area causes the light meter to increase exposure, potentially overexposing teeth. To counteract, use manual (M) mode. Set fixed aperture (f/8-f/16), shutter speed (1/125s-1/200s), and ISO (100-200), controlling exposure via flash output, not auto-exposure.
For high-end aesthetic cases like veneers or anterior crowns, a contraster is standard for lab communication. It provides technicians the clearest view of value, chroma, and incisal characterization, free from soft tissue color contamination. For posterior PFM or monolithic zirconia crowns where function is primary, it is helpful but less critical.
Written by
Dr. Bhavishya Arora
BDS, MDSChief Dental Editor
A contributing clinician at Dentalkart Blogs, Dr. Bhavishya is a compassionate, detail-driven dentist known for thoughtful patient care, clear communication, and a calm chair-side manner that puts patients at ease. Beyond the clinic, she leads product content and category initiatives at Dentalkart India's largest dental marketplace where she bridges clinical understanding with commercial insight to help dentists make better-informed product choices.
Keep reading
Browse all →
Mastering Dental Composite Case Selection in 2026
Mastering Dental Composite Case Selection in 2026Optimal Use for Aesthetic Restorations Effective composite case selection involves matching a material's specif

Cotton Rolls vs Parotid Shields for Isolation?
Cotton Rolls vs Parotid Shields for Isolation?A Moisture Control Decision Guide Effective dental isolation techniques depend on case selection: cotton rolls are
Solving Common Sectional Matrix System Failures
Solving Common Sectional Matrix System FailuresMastering Perfect Class II Contacts Solving sectional matrix system failures requires correct matrix band and rin