
Dr. Bhavishya Arora
Chief Dental Editor
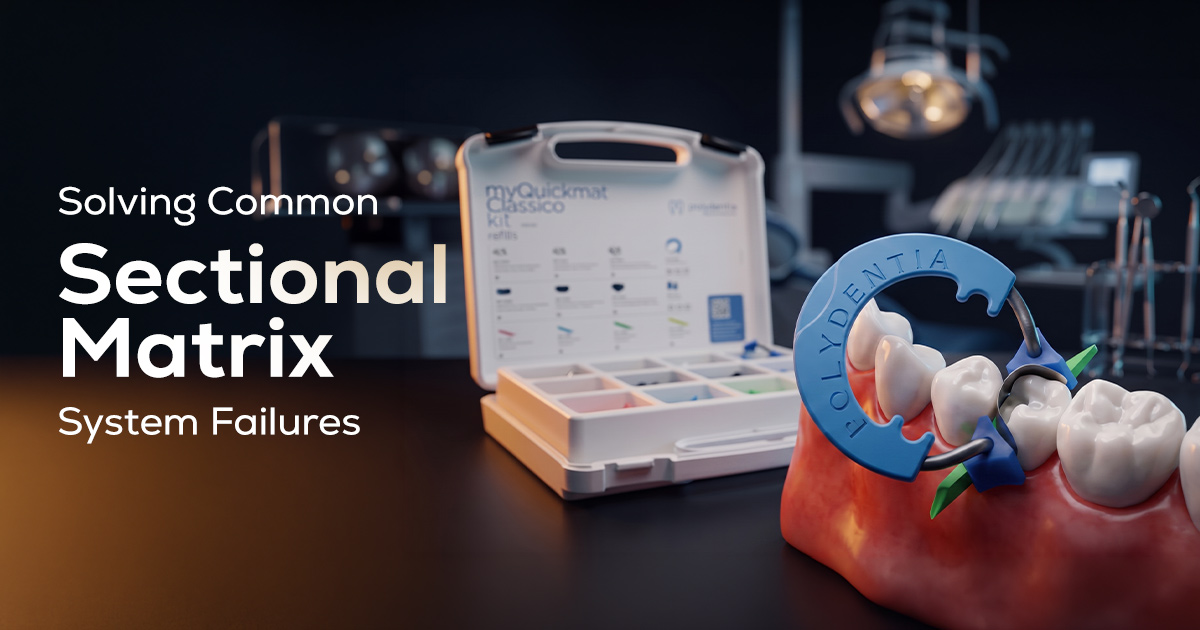
Solving Common Sectional Matrix System Failures
Mastering Perfect Class II Contacts
Solving sectional matrix system failures requires correct matrix band and ring selection, precise technique, and troubleshooting common issues like ring slippage and improper wedging. Mastering a sectional matrix kit creates tight, anatomically correct contact points and prevents post-operative sensitivity.
Table of Contents
Why Am I Getting Open Contacts?
Open contacts with a sectional matrix system primarily result from inadequate tooth separation by the matrix ring, improper matrix band adaptation, or incorrect wedging. These factors fail to compensate for the band's thickness, leading to a post-restorative gap.
A quality sectional ring should exert 3-5 Newtons of separating force to accommodate the band's thickness (typically 35-50 μm). If the ring is fatigued or the band isn't burnished correctly against the adjacent tooth, a negative space forms, resulting in a weak or open contact after matrix removal.
- Ring Fatigue: NiTi rings lose separating force after repeated sterilization (approx. 50-100 cycles). Check for visible deformation or tension loss.
- Improper Burnishing: Vigorously burnish the matrix band against the adjacent tooth's contact area using a smooth-ended instrument for a convex, anatomically correct contour.
- Passive Wedging: A wedge's primary role is to seal the gingival margin and secure the band. Over-wedging can flatten the band's contour and slightly separate teeth, counteracting the ring.
- Composite Technique: Use incremental 2 mm layers. Cure towards the matrix band first to minimize polymerization shrinkage pulling composite from the contact.
The 'Pull-Back' Phenomenon
Polymerization shrinkage causes micro-gaps. Always direct the curing light tip towards the matrix band for the first 3-5 seconds to initiate polymerization at the contact, minimizing shrinkage from the adjacent tooth.
How to Prevent Gingival Overhangs and Ledges
Preventing gingival overhangs requires a perfectly adapted and sealed matrix band at the cervical margin, primarily achieved through proper wedge selection and placement. Overhangs occur when restorative material flows beyond the cavosurface margin of the gingival floor.
This is often caused by a gap between the band and tooth, typically from a wedge that is too small or improperly shaped for the gingival embrasure. The band must be held passively but firmly against the gingival floor for a seamless transition from tooth to restoration. Pre-wedging can also aid visibility and band placement by depressing the papilla.
- Wedge Selection: Choose a wedge requiring firm insertion pressure, creating a visible seal. Anatomic plastic wedges with concave sides often provide superior gingival adaptation than traditional triangular wooden wedges.
- Band Contour: Ensure the selected band has appropriate cervical curvature mimicking tooth anatomy. A flat band won't adapt to a concave root surface, creating a void.
- Matrix Seating: Confirm the band is seated at least 1 mm below the preparation's gingival margin before placing the ring.
- Flowable Liner: When placing flowable composite as a liner, avoid excessive pressure to prevent gingival displacement of the matrix band.
Wedge Selection Guide
What Causes the Matrix Ring to Slip?
Matrix ring slippage, or 'springing off', is typically caused by poor tine adaptation, incorrect placement over the wedge, or using a ring shape incompatible with tooth anatomy. The ring must be stable to apply consistent separating pressure.
Ring tines engage the tooth surface apical to the height of contour on both buccal and lingual aspects. Placed too occlusally, divergent cusp angles force the ring upwards as it closes. Modern rings often feature V-shaped or anatomically contoured tines to grip securely and prevent vertical displacement.
- Placement Protocol: Always place the ring *after* the wedge. Tines should straddle the wedge, not sit atop it, which creates an unstable pivot point.
- Anatomical Mismatch: A ring for wide molars often slips on narrow premolars. Use tooth-specific rings (e.g., short tines for premolars, long tines for molars).
- Unstable Wedge: A poorly seated wedge can act as a fulcrum, causing the ring to pivot and dislodge. Ensure the wedge is fully and passively seated.
- Incorrect Forceps Angle: Approach the tooth with ring placement forceps parallel to the occlusal plane for even pressure and simultaneous seating of both tines.
Stabilizing the Ring
For extra stability on short clinical crowns, place a small 2 mm ball of flowable composite on the buccal and lingual surfaces under the ring tines (away from restoration) and light cure. This creates custom retention points easily flicked off post-procedure.
How to Select the Right Matrix Band
Selecting the right matrix band type and wedge combination involves matching the band's height, thickness, and contour to the clinical situation, and choosing a wedge that seals the gingival margin without distorting the band. This synergy is key to an ideal restoration.
The ideal band should extend 1.0-1.5 mm above the adjacent marginal ridge and at least 1 mm below the preparation's gingival floor. A too-tall band obstructs access and visibility; a too-short one results in a deficient contact point. Explore our selection of matrix bands to find the perfect fit.
- Band Height: Measure the cavity's occluso-gingival height. Select a band that just clears the adjacent marginal ridge for proper contouring.
- Band Thickness: Use ultra-thin 35 μm bands for very tight contacts, ensuring complete post-restoration closure. Standard 50 μm bands suit most other cases.
- Band Contour: Dead-soft bands are easier to burnish and adapt for unique situations. Pre-contoured bands save time and often provide a consistently anatomical shape, a core benefit of a good sectional matrix kit.
- Wedge Synergy: Anatomic wedges with a concave profile adapt better to the root surface and apply even pressure, preventing band deformation and gingival overhangs.
| Matrix Type | Best For | Key Feature |
|---|---|---|
| 35μm Dead-Soft | Extremely tight contacts | Highly adaptable value |
| 50μm Pre-Contoured | Standard Class II cases | Anatomical shape |
| Subgingival Bands | Deep cervical margins | Extended gingival apron premium |
Frequently Asked Questions
Composite bonding to the adjacent tooth occurs when the matrix band is not tightly adapted. To prevent this, burnish the band firmly against the adjacent tooth's contact area before placing the ring. Applying a thin layer of a separating medium like glycerine to the adjacent enamel also acts as an effective non-stick barrier.
Ring memory refers to the NiTi alloy's ability in a sectional matrix ring to return to its original shape after stretching during placement. This property provides consistent separating force over hundreds of uses. Rings with poor memory fatigue quickly, leading to weak or open contacts after as few as 50 autoclave cycles.
A sectional matrix kit for a beginner should include versatile components to shorten the learning curve. Look for a kit with at least two ring sizes (molar/premolar), an assortment of pre-contoured matrix bands of various heights, and anatomical wedges. Systems with non-stick coatings on bands can also be very helpful.
A sectional matrix uses a separate, pre-contoured band and separating ring to create an anatomically correct, convex contact point ideal for posterior composites. In contrast, a Tofflemire matrix band uses a flat, circumferential band tightened around the tooth. This often flattens the proximal surface, resulting in a less ideal, broad contact area and open gingival embrasures.
A 'black triangle' is often caused by improper band contour or over-aggressive wedging that flattens the interdental papilla. To prevent this, use an anatomically contoured matrix band that mimics the natural tooth shape at the cementoenamel junction. Select a wedge that effectively seals the margin without excessively displacing gingival tissue, preserving the natural emergence profile.
Written by
Dr. Bhavishya Arora
BDS, MDSChief Dental Editor
A contributing clinician at Dentalkart Blogs, Dr. Bhavishya is a compassionate, detail-driven dentist known for thoughtful patient care, clear communication, and a calm chair-side manner that puts patients at ease. Beyond the clinic, she leads product content and category initiatives at Dentalkart India's largest dental marketplace where she bridges clinical understanding with commercial insight to help dentists make better-informed product choices.
Keep reading
Browse all →
Ideal Clinical Cases for Dental Photo Contrastors
Ideal Clinical Cases for Dental Photo ContrastorsElevating Your Clinical Photography Dental photography contrastors are non-reflective, black intraoral tools th
Cotton Rolls vs Parotid Shields for Isolation?
Cotton Rolls vs Parotid Shields for Isolation?A Moisture Control Decision Guide Effective dental isolation techniques depend on case selection: cotton rolls are

Achieving a Natural, High-Lustre Composite Polish
Achieving a Natural, High-Lustre Composite PolishA Case-Based Finishing Protocol Composite finishing and polishing is a multi-step procedure using specific burs
