
Dr.Yukti
Dental Content Contributor
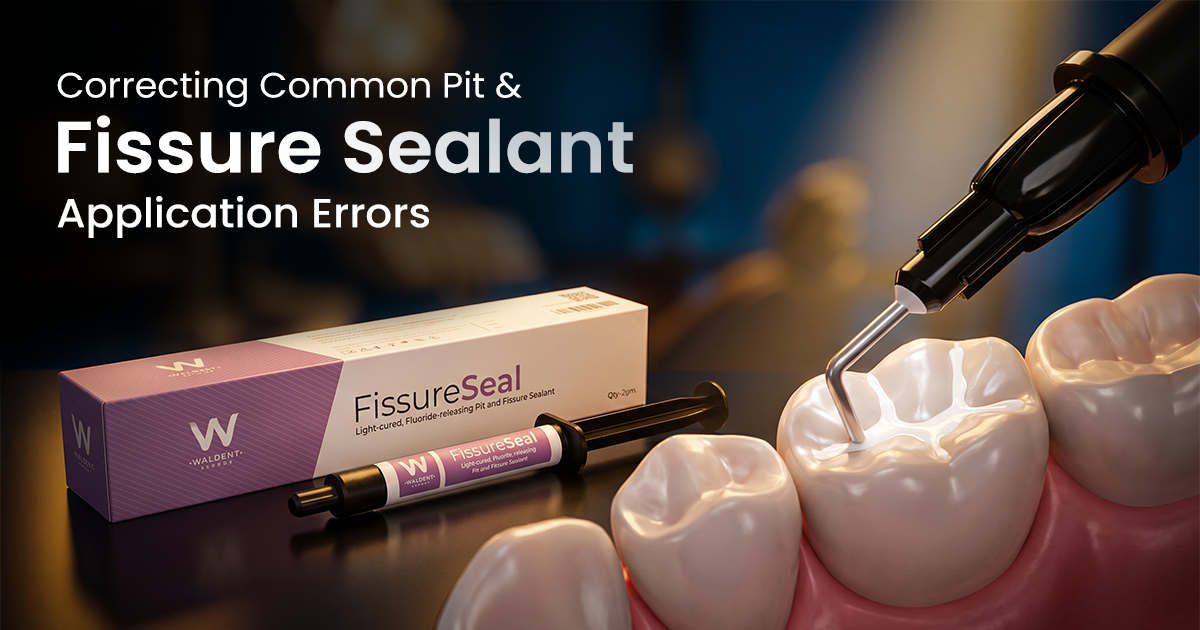
Correcting Common Pit & Fissure Sealant Application Errors
An Evidence-Based Guide
Successful pit and fissure sealant application is technique-sensitive, and most sealant failure traces back to two errors: moisture contamination and improper etching. These procedural lapses compromise the micromechanical bond, leading to dislodgement and subsequent risk of occlusal caries.
Table of Contents
Why Moisture Contamination Causes Sealant Failure
Moisture contamination from saliva or gingival crevicular fluid prevents the formation of a strong, durable micromechanical bond between the sealant resin and the etched enamel surface. This is the single most common reason for sealant failure in clinical practice.
Water molecules and salivary glycoproteins interfere with the low-viscosity resin's ability to penetrate the enamel microporosities created by phosphoric acid etching. This results in a weak adhesive interface, voids, and a high likelihood of early sealant loss. Even a brief 1-second exposure to saliva can completely passivate the high-energy etched surface, requiring re-isolation and re-etching to ensure a successful bond.
- Isolation is key: Use four-handed dentistry for optimal retraction and suction. A rubber dam provides the most definitive isolation, but well-placed cotton rolls and a high-volume evacuator are effective alternatives.
- Re-etch if contaminated: If the etched surface is contaminated at any point, rinse, dry, and re-etch for 10-15 seconds before proceeding.
- Consider primers: In high-risk areas like partially erupted molars, applying a hydrophilic bonding agent after etching can improve resin adaptation and bond strength despite trace moisture.
Saliva: The Primary Culprit
Even minimal salivary contamination after etching requires immediate re-etching for 10-15 seconds. Salivary glycoproteins deposit on the etched surface within seconds, completely inhibiting resin tag formation and guaranteeing adhesive failure.
Ideal Etching Times: Primary vs. Permanent Molars
The ideal etching time for permanent molars using 37% phosphoric acid is 15-20 seconds, while primary molars require a longer duration of at least 30 seconds. This difference is critical for achieving adequate enamel microporosity for sealant retention.
Primary enamel has a less-organized, often aprismatic surface layer that is more resistant to acid demineralization compared to the highly structured prismatic enamel of permanent teeth. Extending the etch time on primary teeth compensates for this structural difference, ensuring a uniformly etched and receptive surface. The clinical endpoint for both is a distinct 'frosty' or chalky-white appearance after thorough rinsing and drying.
- Permanent Molars: Etch for 15-20 seconds.
- Primary Molars: Etch for a minimum of 30 seconds.
- Fluorosed Enamel: May require up to 60 seconds of etching due to increased acid resistance.
- Rinsing Protocol: After etching, rinse thoroughly with an air-water spray for at least 20 seconds to remove the etchant gel and all calcium phosphate by-products.
| Enamel Type | Etching Time (37% H₃PO₄) | Clinical Rationale |
|---|---|---|
| Permanent Molar | 15-20 seconds | Organized prismatic structure |
| Primary Molar | 30+ seconds best | Aprismatic, less regular prism orientation |
| Fluorosed Enamel | Up to 60 seconds | Increased acid resistance |
Prevent Air Bubbles During Sealant Placement
To prevent air bubbles during sealant placement, apply the material from one end of the fissure to the other in a single, continuous motion and then use an explorer tip to gently guide the resin into all pits before curing. This technique minimizes the incorporation of voids that weaken the final restoration.
Air bubbles create significant voids within the sealant or at the sealant-enamel interface. These voids act as stress concentration points under occlusal loading, increasing the risk of cohesive fracture. More importantly, they can harbor bacteria, leading to caries beneath an otherwise intact-appearing pit and fissure sealant.
- Controlled Dispensing: Avoid rapid, forceful extrusion from the delivery syringe, which injects air into the material.
- Continuous Application: Start at the mesial pit and flow the sealant distally without lifting the applicator tip from the tooth surface.
- Explorer Manipulation: Use a clean, sharp explorer or a microbrush to gently drag the sealant along the fissure pattern. This action breaks surface tension and eliminates trapped air.
- Pre-Cure Inspection: Visually inspect the surface, preferably with magnification, for any visible bubbles before light-curing.
Step 1: Controlled Dispensing
Dispense the sealant slowly from the syringe, allowing it to flow without incorporating air. Place the tip at the mesial aspect of the occlusal groove.
Step 2: Continuous Flow
Apply the material in a single, continuous 'pull' stroke toward the distal aspect of the tooth. Do not lift and re-apply the tip mid-fissure.
Step 3: De-Bubbling
Use the tip of a fine explorer to gently guide the sealant into all fissures and break any existing air bubbles. Allow 5-10 seconds for self-leveling before curing.
Clinical Signs of Incomplete Polymerization
The primary clinical sign of incomplete sealant polymerization is a soft, dull, or easily indented surface when probed with a sharp explorer tip after the recommended curing time. A properly cured sealant should feel hard and glass-like.
Incomplete curing leaves a significant layer of unreacted monomers within the sealant matrix, drastically reducing its wear resistance, hardness, and bond strength. Common causes include inadequate curing light intensity (output below 400 mW/cm²), incorrect light tip positioning, or insufficient curing time. This soft outer layer can wear away rapidly in the oral environment, exposing the underlying fissure system to caries risk.
- Explorer Test: After curing, gently drag a sharp explorer across the entire sealed surface. It should glide smoothly without scratching or catching.
- Curing Light Position: The light guide tip must be held perpendicular to and within 2 mm of the sealant surface.
- Curing Time: Adhere strictly to the manufacturer's recommended time, typically 20-40 seconds per application.
- Light Output Check: Regularly verify your curing light's output with a dental radiometer to ensure it meets the minimum required intensity.
Chairside Curing Protocol
For broad occlusal surfaces on molars, use an overlapping curing technique. Cure the mesial half for the full recommended time (e.g., 20 seconds), then move the light tip to overlap and cure the distal half for another 20 seconds to ensure complete polymerization.
Frequently Asked Questions
The primary difference is their bonding mechanism and moisture tolerance. Resin-based sealants require a completely dry field and bond micromechanically to etched enamel, offering superior wear resistance and retention. Glass ionomer sealants bond chemically to tooth structure, are more moisture-tolerant, and release fluoride, but typically exhibit lower long-term retention rates than their resin counterparts.
A 'high' sensation occurs when excess sealant material is placed, creating a premature occlusal contact. This is corrected by checking the bite with articulating paper immediately after curing and selectively removing high spots with a fine finishing bur or stone in a slow-speed handpiece. Always apply the minimum amount of material needed to seal the fissures without over-bulking the occlusal table.
Unfilled sealants are often preferred for pediatric patients because their lower viscosity allows for better penetration into narrow, tortuous fissures. While filled sealants offer greater wear resistance, their higher viscosity can make them harder to place without trapping air. Unfilled sealants also abrade down easily if slightly high, preventing occlusal interferences in a developing dentition.
Dental pit fissure sealants must be clinically evaluated for retention and integrity at every routine recall appointment, typically every 6 months. A sharp explorer should be used to gently trace the sealant margins and surface, checking for any partial loss, fractures, or voids that could compromise their protective effect. Any deficient sealant should be repaired or replaced promptly.
While not always mandatory, using a bonding agent (adhesive) after etching can significantly improve sealant retention, particularly in areas where moisture control is difficult. The hydrophilic monomers in the bonding agent manage residual moisture and enhance the wetting of the etched enamel, creating a more robust hybrid layer and a stronger, more predictable bond for the overlying sealant.
Written by
Dr.Yukti
Dental Content Contributor
Dr. Yukti Jain is a BDS-qualified dental professional and Product Specialist at Dentalkart with expertise in dental materials, equipment, and clinical innovations. Passionate about evidence-based dentistry, she creates insightful, research-driven content that simplifies complex topics and empowers dental professionals to make informed clinical and purchasing decisions.
Keep reading
Browse all →
When to Use Absorbable Gelatin Sponges?
When to Use Absorbable Gelatin Sponges?Clinical Hemostasis Case Selection An absorbable dental hemostatic sponge is a sterile, porcine-derived gelatin foam used

Dental RVG Sensor Quality Assurance Protocol
Dental RVG Sensor Quality Assurance ProtocolA Clinical Calibration Guide A dental RVG (radiovisiography) sensor quality assurance protocol is a set of routine t
Latex vs Nitrile Dental Gloves: A Clinical Comparison
Latex vs Nitrile Dental Gloves: A Clinical ComparisonYour Clinical Selection Guide The choice between latex and nitrile dental examination gloves balances latex