
Dr. Bhavishya Arora
Chief Dental Editor
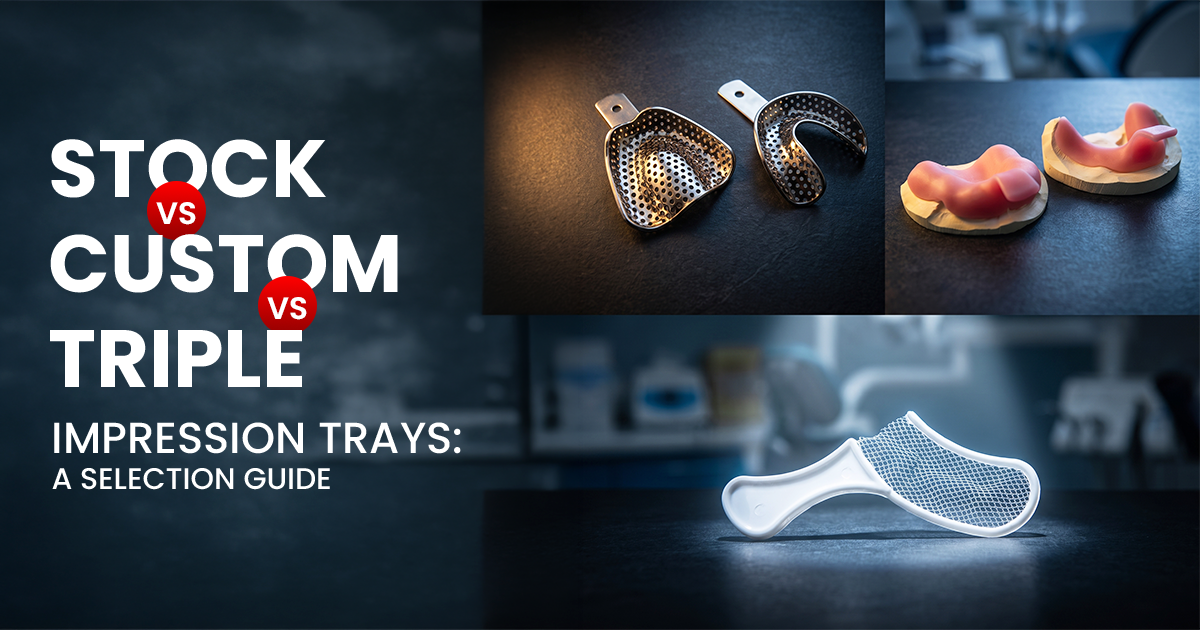
Stock vs Custom vs Triple Impression Trays: A Selection Guide
Predictable Results for Every Case
Choosing between stock, custom, and triple dental impression trays depends on the required accuracy and procedural scope. This choice directly impacts prosthetic fit, chairside time, and lab costs, making correct tray selection a critical skill for efficient clinical practice.
Table of Contents
When a Stock Impression Tray Is Sufficient
A stock impression tray is clinically sufficient for preliminary impressions, diagnostic casts, opposing arch models, and fabricating orthodontic appliances or bleaching trays. These prefabricated trays provide adequate detail for applications not requiring high-precision marginal fit, such as when creating a study model for treatment planning.
The key is to achieve a uniform impression material thickness of 3-5 mm, which is possible with a well-fitting stock tray and a high-viscosity material like alginate. While less accurate than custom trays, their immediate availability and low cost make them indispensable for specific, non-definitive procedures in a high-volume clinic.
- Diagnostic Models: For treatment planning and patient education, the anatomical detail from a stock tray is more than adequate.
- Opposing Arch: Capturing the opposing dentition for single crowns or short-span FPDs rarely requires custom tray precision.
- Removable Prostheses (Initial): Use for the primary impression of complete or partial dentures before fabricating a custom tray for the final wash.
- Orthodontic Study Models: Stock trays efficiently capture the necessary tooth and soft tissue landmarks for orthodontic analysis and appliance fabrication.
Stock Tray Selection Matrix
Absolute Indications for a Special Custom Tray
A special custom tray is mandatory for final impressions of fixed partial dentures (FPDs), multiple-unit implant restorations, and complete dentures to ensure uniform material thickness and prevent tray distortion. These trays are fabricated on a preliminary cast, providing a controlled 2-3 mm space for the impression material.
This controlled space is critical as it minimizes polymerization shrinkage of the material and ensures the passive fit of the final prosthesis. For complex, long-span restorations where microns of error can lead to clinical failure, the dimensional stability offered by a custom tray is non-negotiable.
- Multiple-Unit FPDs: To prevent rocking and ensure accurate die relationships over long spans, a custom tray is the standard of care.
- Full Arch Implant Impressions: Capturing the precise 3D orientation of multiple implant abutments requires the rigidity and stability that only a custom tray provides.
- Complete Dentures (Final): A custom tray allows for accurate border molding, capturing the functional depth and width of the sulcus for optimal retention.
- Flabby Ridges/Abnormal Arch Form: Stock trays cannot adequately support the impression material or capture unique anatomy in these challenging cases.
Custom Trays
- Superior accuracy & stability
- Uniform material thickness (2-3 mm)
- Ideal for complex cases (FPDs, implants)
- Requires a preliminary impression
- Increases chair time & lab cost
Stock Trays
- Immediate availability & low cost
- Sufficient for diagnostic casts
- Prone to distortion
- Uneven material thickness
- Unsuitable for final prosthetics
How Triple Trays Improve Single-Crown Workflow
Triple trays, or dual-arch trays, improve workflow efficiency by capturing the master impression of the prepared tooth, the opposing arch, and the bite registration in a single, simultaneous step. This consolidation is ideal for single-unit posterior crowns where the patient has a stable, repeatable maximum intercuspation (MIP).
By eliminating separate opposing impressions and bite registration steps, chairside time can be reduced by 5-10 minutes per procedure, significantly boosting productivity in a busy practice. The technique relies on the patient's own musculature to articulate the models, which can be highly accurate in the right clinical scenario. It requires a fast-setting, rigid vinyl polysiloxane (VPS) impression material to minimize distortion.
- Ideal Case: A single posterior crown (premolar or first molar) with solid adjacent and opposing tooth contacts.
- Contraindications: Do not use for anterior crowns, bridges, implant impressions, or patients with TMD or an unstable bite. The last tooth in the arch is a poor candidate.
- Technique Tip: Rehearse the bite with the patient *before* loading the tray to ensure they close fully and accurately into MIP.
- Material Choice: Heavy-body PVS for the tray and light-body for the wash around the preparation offers the best combination of rigidity and detail.
Triple Tray Suitability Checklist
Is the restoration a single inlay, onlay, or crown on a premolar or first/second molar?
Does the patient have a clearly defined, repeatable bite with no guidance interferences?
Are there solid tooth stops mesial and distal to the preparation?
Is the prepared tooth the last in the arch? If yes, a triple tray is contraindicated.
Select the Right Tray for Your Impression Material
The choice between metal and plastic trays depends on the rigidity required by the impression material and the clinical application; metal is for reusable accuracy, while plastic is for disposable convenience. Rigid metal trays are ideal for materials like polyethers or PVS that exert significant force during setting and removal, preventing tray flexure that could permanently distort the impression.
Autoclavable stainless steel offers the best dimensional stability for multi-unit cases. Conversely, high-quality, rigid disposable plastic trays are cost-effective and work well with alginates and tray adhesives specific to their polymer type. They are an excellent choice for preliminary impressions and single-unit final impressions where a custom tray is not indicated.
- Metal Trays (Stainless Steel): Best for final impressions with elastomeric materials (PVS, Polyether). Their rigidity is non-negotiable for FPDs and implant-level impressions.
- Rigid Plastic Trays (Disposable): Excellent for preliminary impressions, diagnostic casts, and single-unit cases with PVS. Ensure the plastic is sufficiently thick to resist flexing.
- Mesh Trays (Triple Trays): The fine mesh is designed for material retention, but the frame must be rigid enough to prevent distortion during closure.
- Perforations & Adhesives: Perforated trays provide mechanical retention for alginate, while non-perforated trays rely on a compatible tray adhesive, which must dry for at least 5-7 minutes before use.
| Attribute | Metal Trays | Plastic Trays |
|---|---|---|
| Rigidity | High premium | Variable (Good to Poor) |
| Reusability | Yes (Autoclavable) | No (Single-Use) |
| Primary Use Case | Final Prosthetic Impressions | Preliminary & Diagnostic Impressions |
| Cost | Higher Initial Investment | Low Per-Unit Cost value |
| Adhesive Bond | Good with universal adhesives | Excellent with material-specific adhesives |
Frequently Asked Questions
The main purpose of dental impression trays is to carry the impression material to the mouth, confine it in the correct position, and support it until it has set. A well-designed tray ensures a uniform thickness of material, minimizes distortion upon removal, and accurately captures all necessary hard and soft tissue details for a successful prosthesis.
The primary difference is the method of material retention. Perforated trays have holes that mechanically lock the impression material, making them ideal for materials like alginate which have poor adhesive properties. Non-perforated trays, also called rim-lock trays, are smooth and rely entirely on a chemical bond from a specific tray adhesive, which is essential for elastomeric materials like PVS.
For a full mouth rehabilitation case, a rigid, custom-fabricated special tray is the absolute standard of care. This ensures maximum accuracy across a long span, controls the thickness of the final impression material (typically PVS or polyether) to 2-3 mm, and provides the stability needed to capture precise occlusal and marginal details for multiple preparations simultaneously.
Alginate separating from a stock tray is most often caused by a lack of mechanical retention or incorrect technique. This can happen if a non-perforated tray was used without adhesive, or if the tray was moved during the initial 30-45 second gelation phase. Using a properly sized perforated tray or applying a specific alginate tray adhesive can prevent this common error.
Metal impression trays must be thoroughly cleaned of all debris, then sterilized using an autoclave. A Class B autoclave cycle is recommended as it ensures complete steam penetration through vacuum-assisted cycles. Proper sterilization prevents cross-contamination, but frequent autoclaving can eventually cause minor tray distortion, so they should be inspected for fit regularly.
Written by
Dr. Bhavishya Arora
BDS, MDSChief Dental Editor
A contributing clinician at Dentalkart Blogs, Dr. Bhavishya is a compassionate, detail-driven dentist known for thoughtful patient care, clear communication, and a calm chair-side manner that puts patients at ease. Beyond the clinic, she leads product content and category initiatives at Dentalkart India's largest dental marketplace where she bridges clinical understanding with commercial insight to help dentists make better-informed product choices.
Keep reading
Browse all →
Avoiding Common SSC Case Selection Errors
Avoiding Common SSC Case Selection ErrorsA Pediatric Clinical Guide SSCs are indicated for multi-surface carious primary molars, post-pulpotomy teeth, and high-

Choosing the Right Dental Rubber Dam Clamp
Choosing the Right Dental Rubber Dam ClampAn Isolation Selection Guide Selecting the correct dental dam clamps involves matching jaw design, bow configuration,

Bis-acryl vs. PMMA Temporary Materials
Bis-acryl vs. PMMA Temporary MaterialsA Case Selection Guide The choice between bis-acryl and PMMA provisional crown materials depends on the clinical case: bis